|
|
○ はじめに
前回 は、真っ黒な背景に文字を表示する View を作ってみました。しかし背景が真っ黒では何となく寂しいので、今回は画像を表示する View を作ってみます。
Building Apps with Graphics & Animation にの Displaying Bitmaps Efficiently では、GridView/ImageView/ViewPager 等のウィジェットを使って表示する方法や、大きなサイズの画像や複数の画像をモバイルデバイス用に効率的に管理する方法等について記載されています。
が、ここでは小さめな画像を 1 ファイル使用して表示するだけですので、ゲームの様なアニメーションを自作で実現したい時のために、好きな場所に自由に描画出来る様に View を自作してみます。Canvas & Drawables に書かれているコンセプトです。
○ リソースとして扱える画像形式
Android SDK では、以下の形式の画像をリソースとして扱うことができます。
- png
- jpg
- gif
- 9.png
リソースとして画像を扱うためには、プロジェクトディレクトリ内の res/drawable-* 以下に画像を格納します。すると、次回ビルド時に R.java が更新されて R.drawable.<ファイル名(拡張子を除く)> という ID が定義されます。格納場所は画面の dpi によって最適な画像を格納することが出来ます。dpi 毎に画像を用意する場合、同じファイル名で格納する様にしてください (Supporting Different Screens 等を参照)。
| ディレクトリ名 | 内容 |
|---|---|
| res/drawable-ldpi | ~120dpi までの画面用。mdpiに比べて0.75倍 |
| res/drawable-mdpi | ~160dpi までの画面用。ここがベースラインとして使われる。 |
| res/drawable-hdpi | ~240dpi までの画面用。mdpiに比べて1.5倍 |
| res/drawable-xhdpi | ~320dpi までの画面用。mdpiに比べて2.0倍 |
| res/drawable-nodpi | dpi に依存しない画像の格納場所。ここに格納された画像はスケーリングされない |
例えば res/drawable-mdpi/ball.png の様にして画像ファイルを格納すると、R.drawable.ball という ID が定義されます。
リソースとして用意した画像は、android.content.res.Resources#getDrawable() によって android.graphics.drawable.Drawable のインスタンスとして取得することができます。
public Drawable getDrawable(int id);
○ サンプルプログラムと説明
画像を表示するサンプルプログラムについて説明します。005imageapp.zip からダウンロードできます。はじめに のページから、全てのサンプルプログラムを 固めた zip ファイルをダウンロードすることもできます。
なお、ソースコードは SDK Tools 22.0.4 / プラットフォーム Android 4.2 でコンパイル可能です。local.properties 内に sdk.dir 変数が定義されていますが、ここは環境依存になりますので、お使いの環境に合わせて変更してください。
ソースコード配布は修正 BSD ライセンスに従います(はじめに のページの免責事項を参照してください)。
配布内容のファイルツリーは↓の様になります。res/layou/main.xml が有りますが未使用です。
- 005/
- AndroidManifest.xml
- ant.properties
- bin/
- build.xml
- libs/
- local.properties
- proguard-project.txt
- project.properties
- res/
- drawable-ldpi/ic_launcher.png
- drawable-mdpi/
- ic_launcher.png
- wallpaper.png
- drawable-hdpi/ic_launcher.png
- drawable-xhdpi/ic_launcher.png
- layout/main.xml (未使用)
- values/strings.xml
- src/riolab/sample/
- ImageApp.java
- ImageView.java
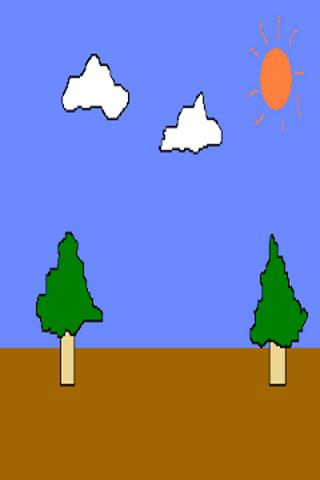
res/drawable-mdpi/wallpaper.png が、表示対象となる画像ファイルです。
↓wallpaper.png (320x480)

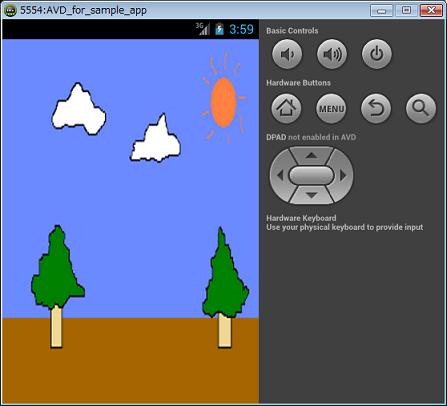
QVGA(320x480:mdpi) のエミュレータで実行すると、↓の様に表示されました。

ここでは
- ImageApp.java
- ImageView.java (自作の View です。android.widget.ImageView とは偶然名前が一緒なだけで無関係です)
について説明します。
- ImageApp.java
1 /* 2 * Copyright (c) 2013, Ryo Ichinose 3 * All rights reserved. 4 * 5 * Redistribution and use in source and binary forms, with or without 6 * modification, are permitted provided that the following conditions are met: 7 * 8 * * Redistributions of source code must retain the above copyright 9 * notice, this list of conditions and the following disclaimer. 10 * * Redistributions in binary form must reproduce the above copyright 11 * notice, this list of conditions and the following disclaimer in the 12 * documentation and/or other materials provided with the distribution. 13 * * Neither the name of the auther nor the 14 * names of its contributors may be used to endorse or promote products 15 * derived from this software without specific prior written permission. 16 * 17 * THIS SOFTWARE IS PROVIDED BY THE COPYRIGHT HOLDERS AND CONTRIBUTORS "AS IS" 18 * AND ANY EXPRESS OR IMPLIED WARRANTIES, INCLUDING, BUT NOT LIMITED TO, 19 * THE IMPLIED WARRANTIES OF MERCHANTABILITY AND FITNESS FOR A PARTICULAR 20 * PURPOSE ARE DISCLAIMED. IN NO EVENT SHALL THE COPYRIGHT OWNER OR 21 * CONTRIBUTORS BE LIABLE FOR ANY DIRECT, INDIRECT, INCIDENTAL, SPECIAL, 22 * EXEMPLARY, OR CONSEQUENTIAL DAMAGES (INCLUDING, BUT NOT LIMITED TO, 23 * PROCUREMENT OF SUBSTITUTE GOODS OR SERVICES; LOSS OF USE, DATA, OR PROFITS; 24 * OR BUSINESS INTERRUPTION) HOWEVER CAUSED AND ON ANY THEORY OF LIABILITY, 25 * WHETHER IN CONTRACT, STRICT LIABILITY, OR TORT (INCLUDING NEGLIGENCE OR 26 * OTHERWISE) ARISING IN ANY WAY OUT OF THE USE OF THIS SOFTWARE, EVEN IF 27 * ADVISED OF THE POSSIBILITY OF SUCH DAMAGE. 28 */ 29 30 package riolab.sample; 31 32 import android.app.Activity; 33 import android.os.Bundle; 34 import android.view.Window; 35 36 public class ImageApp extends Activity 37 { 38 /** Called when the activity is first created. */ 39 @Override 40 public void onCreate(Bundle savedInstanceState) 41 { 42 super.onCreate(savedInstanceState); 43 requestWindowFeature(Window.FEATURE_NO_TITLE); 44 setContentView(new ImageView(this)); 45 } 46 }- 43 行目
描画領域を目一杯使いたいので、Activity#requestWindowFeature(Window.FEATURE_NO_TITLE) を実行して、ウィンドウタイトルを表示しない様にしています。
- 44 行目
今回は UI レイアウト定義ファイルを用意せず、直接 View を画面と結び付けます。そのため、Activity#setContentView(View) を使って直接 riolab.sample.ImageView のインスタンスを指定しています。
- ImageView.java(自作の View です。android.widget.ImageView とは偶然名前が一緒なだけで無関係です)
    1	/*
    2	 * Copyright (c) 2013, Ryo Ichinose
    3	 * All rights reserved.
    4	 *
    5	 * Redistribution and use in source and binary forms, with or without
    6	 * modification, are permitted provided that the following conditions are met:
    7	 *
    8	 *    * Redistributions of source code must retain the above copyright
    9	 *      notice, this list of conditions and the following disclaimer.
   10	 *    * Redistributions in binary form must reproduce the above copyright
   11	 *      notice, this list of conditions and the following disclaimer in the
   12	 *      documentation and/or other materials provided with the distribution.
   13	 *    * Neither the name of the auther nor the
   14	 *      names of its contributors may be used to endorse or promote products
   15	 *      derived from this software without specific prior written permission.
   16	 *
   17	 * THIS SOFTWARE IS PROVIDED BY THE COPYRIGHT HOLDERS AND CONTRIBUTORS "AS IS"
   18	 * AND ANY EXPRESS OR IMPLIED WARRANTIES, INCLUDING, BUT NOT LIMITED TO,
   19	 * THE IMPLIED WARRANTIES OF MERCHANTABILITY AND FITNESS FOR A PARTICULAR
   20	 * PURPOSE ARE DISCLAIMED. IN NO EVENT SHALL THE COPYRIGHT OWNER OR
   21	 * CONTRIBUTORS BE LIABLE FOR ANY DIRECT, INDIRECT, INCIDENTAL, SPECIAL,
   22	 * EXEMPLARY, OR CONSEQUENTIAL DAMAGES (INCLUDING, BUT NOT LIMITED TO,
   23	 * PROCUREMENT OF SUBSTITUTE GOODS OR SERVICES; LOSS OF USE, DATA, OR PROFITS;
   24	 * OR BUSINESS INTERRUPTION) HOWEVER CAUSED AND ON ANY THEORY OF LIABILITY,
   25	 * WHETHER IN CONTRACT, STRICT LIABILITY, OR TORT (INCLUDING NEGLIGENCE OR
   26	 * OTHERWISE) ARISING IN ANY WAY OUT OF THE USE OF THIS SOFTWARE, EVEN IF
   27	 * ADVISED OF THE POSSIBILITY OF SUCH DAMAGE.
   28	 */
   29
   30	package riolab.sample;
   31
   32	import android.content.Context;
   33	import android.content.res.Resources;
   34	import android.graphics.Bitmap;
   35	import android.graphics.Canvas;
   36	import android.graphics.Paint;
   37	import android.graphics.drawable.Drawable;
   38	import android.view.View;
   39
   40	public class ImageView extends View
   41	{
   42	    private final Paint paint = new Paint();
   43	    private Bitmap bitmap;
   44
   45	    public ImageView(Context context)
   46	    {
   47		super(context);
   48
   49		Resources res = context.getResources();
   50		Drawable drawable = res.getDrawable(R.drawable.wallpaper);
   51
   52		int w = drawable.getIntrinsicWidth();
   53		int h = drawable.getIntrinsicHeight();
   54
   55		// Here, I'm converting drawable into bitmap for sample use,
   56		// but it's not necessary as I'm saying at the comment within onDraw().
   57
   58		bitmap = Bitmap.createBitmap(w, h, Bitmap.Config.ARGB_8888);
   59		Canvas canvas = new Canvas(bitmap);
   60
   61		drawable.setBounds(0, 0, w, h);
   62		drawable.draw(canvas);
   63	    }
   64
   65	    @Override
   66	    public void onDraw(Canvas canvas)
   67	    {
   68		// This progrem is using Canvas#drawBitmap(),
   69		// but it's O.K. to use Drawable#draw(Canvas) instead.
   70		// In that case, make sure to use Drawable#setBounds()
   71		// to specify the region to be drawn.
   72
   73		super.onDraw(canvas);
   74		canvas.drawBitmap(bitmap, 0, 0, paint);
   75	    }
   76	}
画像データをリソースから取得して、画面に表示する自作 View クラスです。
- 45 〜 60 行目 (ImageView())
コンストラクタ内で、画像データを取得します。
- 49 〜 50 行目
Resources#getDrawable() を使い、画像データを Drawable のインスタンスとして取得します。
public Drawable Resources#getDrawable(int id);
後に View#onDraw(Canvas) で画像データを描画する際に、android.graphics.Bitmap のインスタンスとして扱える方が便利なため、以降で Drawable -> Bitmap の変換を行っておきます。
※プログラム中のコメントの通り、Bitmap に変換しなくても Drawable#draw(Canvas) を onDraw() で使えば描画できます。その場合は Drawable#setBounds() を使って Canvas への描画領域を指定します。どちらでも構わないと思います。
- 52 〜 53 行目
Drawable#getInstrinsicWidth()/getIntrinsicHeight() を使って、画像の幅と高さを取得します。
public int Drawable#getIntrinsicWidth();
public int Drawable#getIntrinsicHeight();
- 58 〜 59 行目
幅と高さを取得したら、画像同じ幅と高さを持つ Bitmap を作成し Bitmap を描画対象とする Canvas を作成します。Bitmap の作成には Bitmap#createBitmap() を使います。Bitmap#createBitmap() には引数が異なる数種類のシグナチャがありますが、ここでは↓を使います。
public static Bitmap Bitmap#createBitmap(int width, int height, Bitmap.Config config);
config には下記のいずれかを指定します。
定数名称 内容 Bitmap.Config.ALPHA_8 各ピクセルはアルファ値のみ格納 Bitmap.Config.ARGB_4444 API level 13 以降は非推奨 Bitmap.Config.ARGB_8888 各ピクセルは 4 バイト値として格納 Bitmap.Config.RGB_565 各ピクセルは 2 バイト値として格納し、かつアルファ値は格納しない Canvas の作成は、作成したばかりの Bitmap のインスタンスをコンストラクタに指定するだけです。
- 61 〜 62 行目
最後に、今作成した Canvas に対して Drawable#draw(Canvas) を実行します。が、その直前に Drawable#setBounds() を実行して、Canvas のどの領域に Drawable を描画するかを指定する必要があります。Drawable#setBounds() も数種類のシグナチャがあるので、ここで使っているシグナチャ以外については API ドキュメントをご覧下さい。
public void Drawable#setBounds(int left, int top, int right, int bottom);
public void Drawable#draw(Canvas canvas);
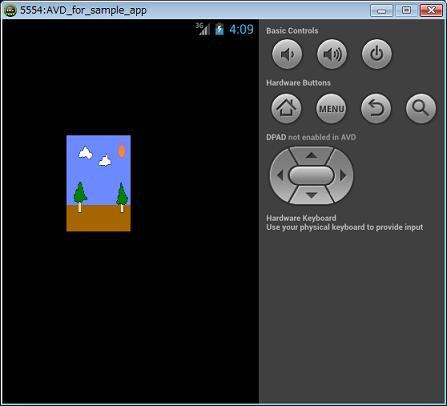
ここでは、Drawable#setBounds() で Canvas 全体を指定することで Drawable を Canvas 全体に描画する様に指示しています。例えばここで Drawable#setBounds(0, 0, w, h) の代わりに Drawable#setBounds(80, 120, 160, 240) とすると、QVGA(320x480:mdpi) のエミュレータでは↓の様な結果となります(縮小表示)。

- 65 〜 75 行目 (onDraw())
Canvas#drawBitmap() を使って、Bitmap の内容を画面に描画します。ここで使っている Canvas#drawBitmap() のシグナチャは↓の通りです。
public void Canvas#drawBitmap(Bitmap bitmap, float left, float top, Paint paint);
以上で解説は終わりです。次回は、キー入力を View で拾う方法についてご紹介します。
○ View の背景として表示する方法
今回のサンプルプログラムでは、好きな位置に自由に画像データを描画する方法を紹介しましたが、単に View の背景として表示したい場合にはもっと簡単な方法があります(android.widget.ImageView 等は使わずに)。
画像データを表すリソースを、文字通り View の背景に設定してあげる方法です。プログラムで行う場合は
public void View#setBackground(int id);
を使います。id はリソース ID を指定します(R.drawable.<画像ファイル名(拡張子除く)>)。UI レイアウト定義ファイルを使う場合は、View を表すタグの属性に android:background="@drawable/<画像ファイル名(拡張子除く)>" を追加します。
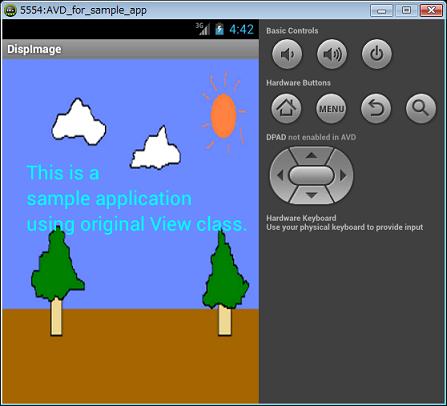
例えば、前回 のサンプルプログラムの背景に今回使った wallpaper.png を表示する場合
- wallpaper.png を res/drawable に格納
- res/layout/viewsample.xml の CustomView タグを以下の様に記述
1
<riolab.sample.CustomView android:id="@+id/customView" android:layout_width="fill_parent" android:layout_height="fill_parent" android:background="@drawable/wallpaper" /> - CustomView.java#onDraw(Canvas) から、canvas.drawColor(bgColor); の一行を削除
とします。これにより、QVGA(320x480:mdpi) のエミュレータでは↓の様な結果となります。
